As we know, the Salesforce Marketing Cloud is made up of several modules that cover different areas of Digital Marketing for B2B and B2C. Sending emails that generate a positive impact on our clients’ subscribers represents a fundamental area in Email Marketing strategies. Therefore, Marketing Cloud covers this aspect with tools such as Email Studio and in particular the A/B tests.
The A/B tests allow you to send two initial “test” versions of the same email using Email Studio in Marketing Cloud to two different groups of subscribers from the same data extension or list.
These tests can vary in terms of, for example, the subject, the preheader, the body of the email, the versions of the email or the creatives. Finally you can send the version that has given the best results to all the remaining subscribers of the data extension or list.
If you’re not yet familiar with the Salesforce Marketing Cloud and would like an overview of what it offers, we invite you to read the following article to find out What is the Marketing Cloud? The Salesforce Digital Marketing Hub.
How do A/B tests work?
First of all, we must take into account that the system will randomly select which subscribers will receive both tests, allowing you to use the same set of subscribers for future A/B tests and to send the winning version, which has given the best results to the rest of your subscribers automatically when it is determined which one it is.
Although the A/B tests are part of the testing process, you will be sending the emails to actual subscribers, so you must guarantee the quality of both versions. Use the A/B test before sending the final version to the rest of your subscribers, always after you have obtained the test results.
In this way, Marketing Cloud will send both versions of our email to the test recipients, who may represent, for example, 20% of the total. That is, version “A” would receive 10% and version “B” would receive another 10%. Once we know which version has had the best results, it will be sent to the other subscribers automatically. If you prefer, you can also send it manually. Following the example, it would be the remaining 80%.
If you prefer to send the email manually, you can analyze these results and send the other subscribers the version that best suits your requirements.
Steps for setting up an A/B test
Setting up an A/B test in the Marketing Cloud is not only extremely useful, but also simple.
The first step is to define the objectives of the test. As we have just seen, three of the most common objectives are to determine the highest opening rate, the click rate and the interaction rate. Next, identify your subscribers to perform the A/B Test. You can select from a list of subscribers, a group, a data extension or a data filter. You can now configure the A/B Test in Email Studio:
1. Enter Email Studio. Click on A/B Testing and then Create A/B Test.
2. Assign a name to your test and add a description if you wish.
3. Determine your type of test:
Depending on our preferences, we can test within the following fields: Subject, email version, email content, sender’s name, date/time of sending and preheader.
If you want to test specific email content areas, make sure you have added a Test A/B content block to the email.
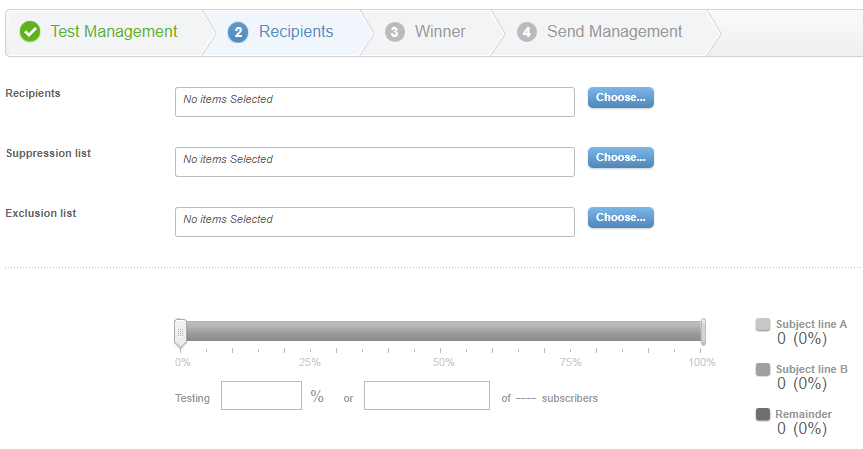
4. Choose the recipients of the test:
Select the lists of subscribers, groups, data extensions.
- Click on Select
- It determines its distribution. This is the number of subscribers you are actually sending the test to. You can manually enter the percentage or the number of subscribers you want to include.

5. Establish the criteria of the email with best results. You can choose between:
- Highest single open rate (total number of emails opened by single recipients divided by the number of emails delivered in the campaign).
- Highest Click Through Rate (CTR) (percentage of recipients who have clicked on any link in your email).
6. Specifies the duration after which the system will determine the email that has given the best results.
7. When running an A/B test on the subject of an email select whether you want the line from the subject that has given the best results to be saved again in the original email.
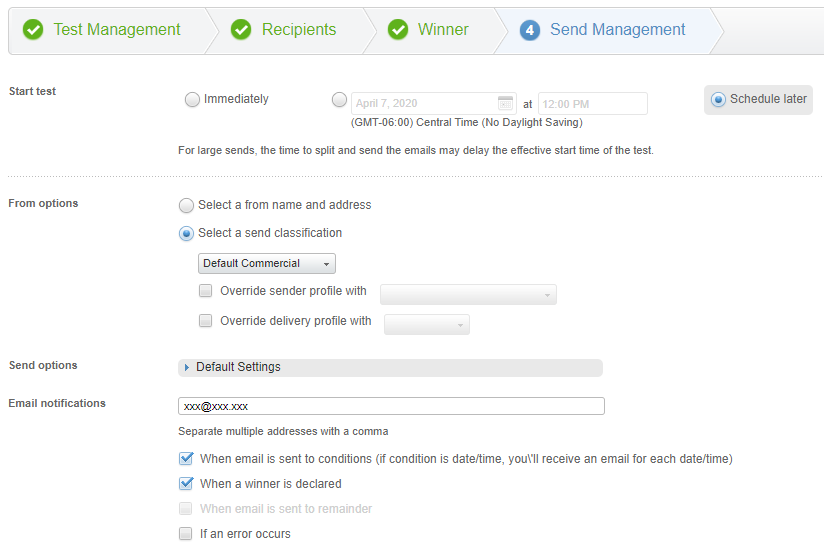
8. Schedule the implementation of the A/B test
- Select a start time: immediately, scheduled or schedule later.
- Select how to send the email that has given the best results: automatically or manually.
9. Configure sending options
- Select a shipping option
- Click on Finish
- Click on Confirm
Following these simple steps you will have created an A/B Test in Marketing Cloud ready to be executed or programmed, and with it you will be able to measure the different versions of your email or content within your email.
Conclusions
We are convinced that with this guide you will be able to successfully set up and run your A/B tests in Email Studio de Marketing Cloud and use them to optimize your future email campaigns with the highest degree of satisfaction and engagement. Testing these variables on a regular basis will allow you to track the results of your email and see which version has the highest single open rate or the highest single click rate. In addition, by performing Test A/B you will be able to discover patterns that work well in your emails and discard patterns that don’t usually give satisfactory results in future emails.
For all these reasons, A/B tests are a powerful module within Email Studio since they allow you to optimize your email marketing campaigns to deliver more specific and relevant messages to your subscribers. By automating the testing process, you will save time and resources. Performing a correct use of A/B tests is a task that requires care and experience, and at ShowerThinking we are specialists in developing together with your company automation and management programs for Email Marketing through the Marketing Cloud.
Therefore, if you need help or training in Marketing Cloud , our team of professionals will advise you on everything you need. Do not hesitate to contact us!
