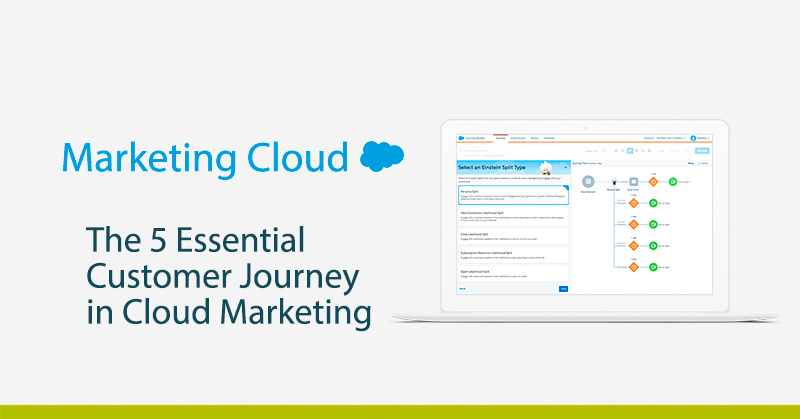
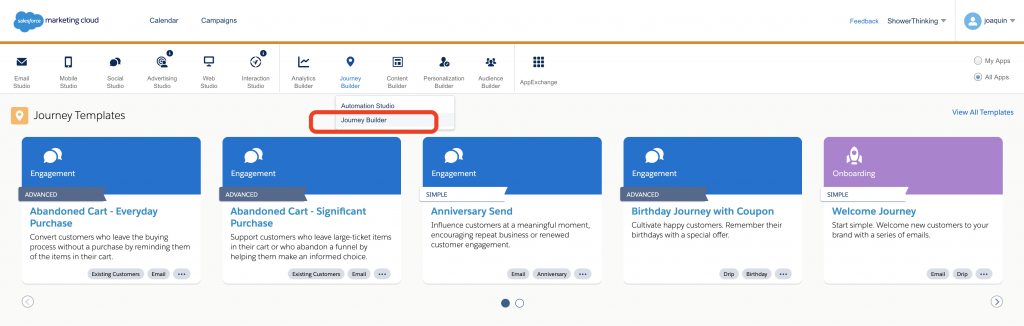
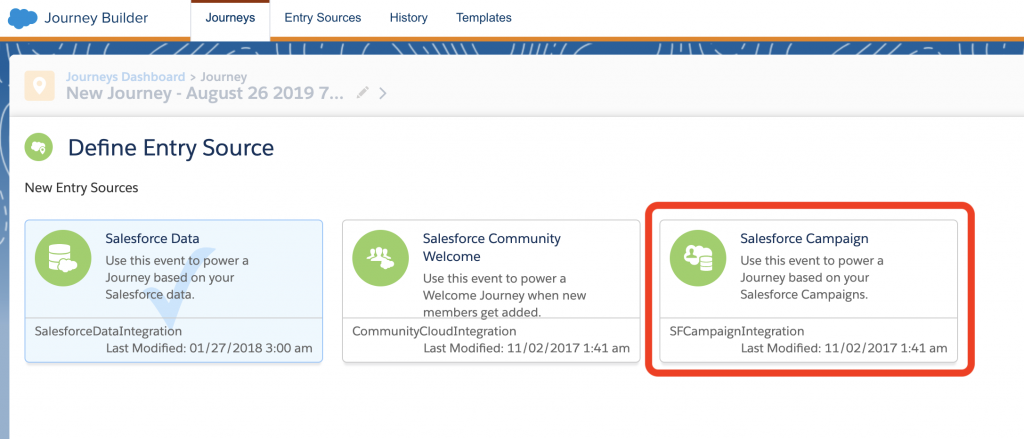
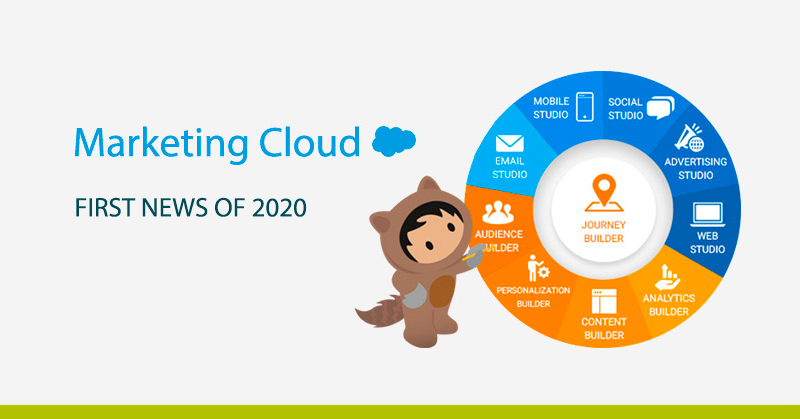
Salesforce Marketing Cloud: News for 2020

News Marketing Cloud 2020

Salesforce has an annual cycle of three releases (Winter, Spring and Summer). In turn, this year’s Marketing Cloud will have 5 launches spread over January and October, which will bring many new features such as those we will see below.

If you already work with Marketing Cloud you will be interested in knowing all the changes that will be effective from February in the application, so pay attention to be up to date and get the most out of the new features and functionalities that Salesforce will introduce.

However, if you’re not yet familiar with the Salesforce Marketing Cloud, we recommend you read the following article first to find out What is the Marketing Cloud? The Salesforce Digital Marketing Hub.

How many new features will there be in the Marketing Cloud?

Advertising Studio

Several modifications have been made within the Dashboard of Advertising Studio’s Lead Capture app. Users can now sort, search, filter, receive notifications, and more directly from the Lead Capture Dashboard (available on the AppExchange).

Contact Builder

Contact Builder has undergone two small modifications that will be of great help to the users of the Marketing Cloud. On the one hand, within the “Data Extensions” tab, a column called “Record Count” will be included in which the number of records per Data Extension can be seen. On the other hand, within the “All Contacts” tab, there have been 3 changes in the name labeling, thus changing its name:

  • SMS will be Mobile Connect
  • Push will be MobilePush
  • OTT will be GroupConnect

Content Builder

From this release, images hosted on Sitecore Content Hub can be added to emails and content blocks. In addition, it will be possible to add tags from the library to each file and a backspace icon will be included in each file type.

Journey Builder

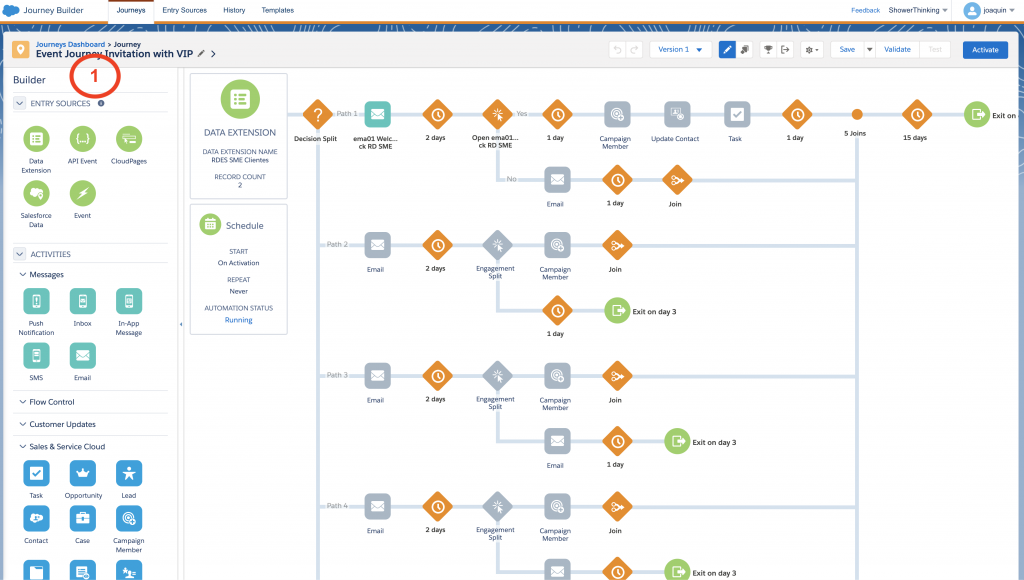
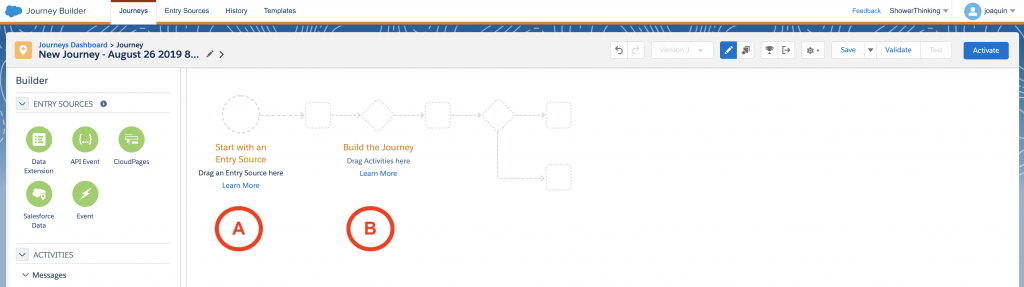
Starting with this first release in 2020, simple submissions can be created, sent and monitored from Journey Builder with a single click, distinguishing between a multi-step journey and a single entry, single submission journey. Also, user permissions will begin to affect the creation of journeys in Journey Builder, meaning that if a user does not have sufficient permissions to create emails or view Data Extensions for example, they will not be able to access this functionality in Journey Builder (to correct this type of error the ideal is to give the user the role of Cloud Marketing Manager).

Social estudio

Social Studio is taking a big step this 2020 with a great series of new features. First, you can create Instagram stories from Social Studio and assign them to a mobile user for later publication (all through notifications). Secondly, through Command Center Instagram hashtags can be used as a data source. Finally, accounts associated with Facebook, Instagram or Google My Business can be removed from Social Studio, which is quite useful considering that previously only some of the pages could be transferred to a new user (this functionality is ideal in case the person in charge changes jobs or leaves the company for example).

command center marketing cloud

Email estudio

As we will see in the next section, in Email Studio there have been a few changes that will remove previous features.

Einstein Marketing Insights

This app within the Marketing Cloud allows you to further analyze the performance of mailings made in Email Studio or Journey Builder by discovering factors that affect the behavior of subscribers. In this way, Einstein Marketing Insights will allow from the new launch:

  • To measure the impact of the subject lines in emails, allowing to know the most used subjects, the ones with the best performance, the most used lines and phrases and the hypothetical impact regarding the open rate.
  • Discover anomalies with respect to the performance of emails sent during the last 90 days, and warn of any anomalies through notifications.
  • Possibility to choose the appropriate period of time to send an email through Einstein Send Time Optimization (STO).

Mobile Studio

Like Social Studio, Mobile Studio grows exponentially and incorporates new and interesting features such as:

  • Import contacts within GroupConnect through the Import Wizard or via API and delete unwanted LINE messages in the main menu.
  • Access the Mobile Connect Administrator pages from Setup and associate campaigns with SMS activities in Journey Builder.
  • Activate rich media notifications in MobilePush Administration.
  • Updated version of MobilePush SDK with advances for iOS 13, geolocation messaging and more.

Web Studio

The only new feature of Web Studio is the inclusion of permissions for CloudPages, so you can manage access to CloudPages, both the permission to view, edit, publish, etc.

In addition to all the above developments, there will be new features to improve the user experience of both the content creator and the Cloud Marketing Manager.

Functionalities that will pass to a better life

It’s not all news in this early-year release, as Salesforce has decided to remove a number of cloud marketing features. The features that will come to life are as follows:

  • Cloud Marketing Campaign Approvals. This functionality will disappear from the Marketing Cloud and therefore Content Builder Approvals will have to be used to approve emails.
  • Classic Approvals. Like the previous one, this form of approval will be removed from the Marketing Cloud.
  • Creation of Classic Live Content. To replace this functionality we can use the live content of Content Builder Block SDK.
  • Creation of Classic Emails. This functionality will be removed from June 2020.
  • Salesforce Marketing Cloud Connector for Microsoft Dynamics 2011. This connector will support integration with versions of Microsoft Dynamics 2013 or higher.
  • Elimination of Select All Checkbox within Synchronized Data Extensions.

Conclusions

Salesforce release

With its cyclical system of annual releases, Salesforce enables a major improvement within the Marketing Cloud that this year will be reflected above all in providing a better user experience. Thus, we have seen that functionality related to “Classic Content” will gradually disappear from the platform to give more weight to apps within the Marketing Cloud as Social Studio, Mobile Studio or Journey Builder, which are in the process of growth and adaptation within the platform.

In addition, life will be made easier for the Cloud Marketing Manager, allowing him to assign a wide variety of roles to different users (allowing him to better segment the work team) and providing him with new tools available to everyone from the main Administration menu.

Carrying out a correct use within the Marketing Cloud is a task that requires care and experience, but from ShowerThinking we are specialists in developing together with your company programs of automation and management of Marketing through platforms like Marketing Cloud. Therefore, if you need help or training in Cloud Marketing we have the right team that can help you, so do not hesitate to contact us!

Contact Builder in Marketing Cloud: audiences, data extensions

Contact builder, Marketing Cloud

Contact Builder is the application within the Marketing Cloud that provides access to account contact data and relationships designed to be used conveniently. With Contact Builder, we can manage, consolidate, organize and link data from all of the Cloud Marketing applications and external sources.

If you’re not yet familiar with the Salesforce Marketing Cloud and would like an overview of what this platform offers, we invite you to read the following article to find out What is the Marketing Cloud? The Salesforce Digital Marketing Hub.

Data sources

Contact Builder within Marketing Cloud, is like any contact manager within a Marketing Automation tool. As with other tools, you can synchronize your Marketing Cloud data with other types of data sources. The ideal in Contact Builder is to synchronize Marketing Cloud with the information contained in Salesforce CRM (if you have one), but if you have another type of CRM you can also connect it, although many times you need to make a custom development and integration.

Within Contact Builder there are three types of Data Sources:

  • System Data Sources: Within this type of data sources are included those related to Cloud Marketing, email applications, mobile applications or those related to Einstein Predictive Intelligence.
  • Synchronized Data Sources: This type of data sources are usually those naturally synchronized in the Marketing Cloud, such as data stored in Salesforce CRM.
  • Custom Data Sources: As the name suggests, these are custom data sources, where most of the time a custom integration is needed to make them work properly with Marketing Cloud.

Data extesion

Data extension Marketing Cloud

Within Contact Builder, one of the most common actions is to manage, administer and create Data Extensions, but… What is a Data Extension?

A Data Extension is a table within the application database (in this case Cloud Marketing) that contains your data. It can be used to store a list of contacts (to send them an email, for example) but it can also be used to store any kind of information (products that a customer has bought, service contract history). In short, you can use a data extension to store subscriber information (as you do with lists) or to store relational data for these subscribers. Data extensions are very similar to tables in a database, as they are usually related to each other and serve to keep your contact information as complex as you want.

If you want to go deeper into the use of Data Extensions in the Marketing Cloud, we recommend reading the following article which specifies when to use a Data Extension or a subscriber list in the Marketing Cloud.


Attribute Groups: Contact records and Data Extensions

The logic of managing Data Extensions in the Marketing Cloud is the possibility of linking data from several data extensions in a single contact record. In order to understand this type of logic, we need to know that any Data Extension has a number of records. Each record in a Data Extension is a “contact” that makes up that database, but there can be the same contact record in several Data Extensions. Therefore, when using Contact Builder we need to link the data from several Data Extensions so that our subscribers are as complete as possible.

To make this step possible it is necessary to create attribute groups. Attribute groups allow you to organize your data because each group includes a data model consisting of data extensions linked to contact records or other data extensions. In addition, you can include as many data extensions as you need in an attribute group and you can use these groups in templates within Contact Builder.

Import of data

Contact Builder is the ideal application for importing data into the Marketing Cloud. Within the Import menu, you can import data in two different ways:

  • Import Into Data Extension: This option allows you to import a series of data or a database into a Data Extension and configure the definition of the fields that will make up that Data Extension. This function is useful to define your own fields and not to make mistakes when importing data.
  • Import Into a List: This option allows you to import data into a subscriber list or import data into the All contacts section. This option is ideal when you want to make a list of subscribers for an emailing for example, since Data Extensions are more complex databases, used for other types of purposes.

Best practices in Contact Builder

Deskop Content Builder

When you use Contact Builder, you must have a series of clear basic concepts to ensure the integrity and order of your data in a correct way. Therefore, the most important and fundamental concept to keep in mind is: Always use a single contact key per contact. This decision allows you to assign an email address, phone number and other information collected through different communication channels to your own contact (identified by the same contact key/subscriber key). The contact key must be a value that cannot be changed in the future (such as a physical address) and must always be unique for each contact, so ideally this value should be an ID (in the case of Salesforce it could be the Salesforce ID field) or an identifying number containing alphanumeric characters (never numeric only).

Another fundamental concept to keep in mind is to understand the difference between “All Contacts” and “All Subscribers” lists. These two lists may seem the same but have a big difference. On the one hand, the “All Contacts” list shows all the contacts collected within the Marketing Cloud (from Contact Builder). On the other hand, the “All Subscribers” list shows all the contacts subscribed within Email Studio, which can receive emails and communications from the Marketing Cloud.

A third fundamental concept to keep in mind is to avoid deleting contacts. This happens because Marketing Cloud always keeps information about the contacts even if they have been deleted from modules such as Email Studio. It is therefore important to avoid deleting contacts unless it is strictly necessary, so that the process of unsubscribing among other things is completed correctly and that information is reflected in the Marketing Cloud.

Finally, it should be noted that ContactID and SubscriberID are not the same as ContactKey and SubscriberKey. In theory, both ContactID and SubscriberID are used as substitute keys in the internal systems of the Marketing Cloud, which means that they are reflected in activities such as tracking extracts or system data views when performing queries. Therefore, it is not advisable to use these values in our activities in the Marketing Cloud, but rather to always use both the ContactKey and the SubscriberKey.

In short, Contact Builder is a powerful module within the Marketing Cloud since it is the basis of our communications by allowing us to import and host contacts and information from them in relational data systems. Therefore, a correct use of Contact Builder is a task that requires care and experience, but from ShowerThinking we are specialists in developing together with your company automation and marketing management programs through Marketing Cloud. Therefore, if you need help or training in Cloud Marketing we have the right team that can help you, so do not hesitate to contact us!


Salesforce Marketing Cloud Email Specialist Certification

Exam MC email specialist

In relation to the topic I already mentioned in this post about Salesforce Certifications, I’m going to try to solve your doubts about how to take the exam for Cloud Email Marketing Specialist.

First things first: there are four exams to obtain the complete Cloud Marketing Certification:

  • Cloud Marketing Manager: Designed for administrators who can set up cloud marketing products using industry and product best practices. Candidates should generally be familiar with the data structure in subscriber data management and can navigate the Setup. Certified Cloud Marketing administrators can successfully resolve account settings and user requests.
  • Cloud Email Marketing Specialist: designed for those who can demonstrate knowledge, skills and experience in email marketing best practices. Includes message design, subscriber and data management, inbox delivery, and external integrations with the Email Marketing Cloud application.
  • Cloud Marketing Developer: Certified Cloud Marketing developers have hands-on experience developing across the platform. They create dynamic, personalized messages and landing pages, and are proficient in the Cloud Marketing scripting languages. They also have experience in advanced segmentation, reporting and analysis, and data configuration.
  • Cloud Marketing Consultant: Designed for those who can configure and deploy Salesforce Marketing Cloud application tools, providing solutions for running tactical and strategic email campaigns. Candidates must have extensive knowledge of Salesforce applications, set up and regularly manage Salesforce, and work with stakeholders to define requirements

Who it is aimed at

The Salesforce Marketing Cloud Email Specialist credential is geared toward individuals who want to demonstrate their expertise in email marketing best practices, message design, subscriber and data management, inbox delivery, email automation, and tracking and reporting metrics within the Marketing Cloud Email application.

About the exam

Now I’m going to explain the general idea of how the exam is.

  • Content: 60 multiple choice questions
  • Time allocated to complete the exam: 105 minutes
  • Score to pass: 68%
  • Language: English
  • Registration fee: USD 200, plus applicable taxes as required by local law
  • Recovery fee: USD 100, plus applicable taxes as required by local law
  • Delivery options: supervised exam delivered on-site at a test center or in an online supervised environment.
  • Prerequisite: There are no prerequisites for this exam, however, I recommend that you complete the recommended Trailhead path provided by Salesforce as a practice before completing this exam.

Examination Outline

First of all, to start preparing for the exam we should visit the home page of the exams. Here you will find the basic information about the exam, the registration form and of course the study guide, all completely free of charge. You will also have access to support modules that reflect the points of the study guide, each section includes E-Learning modules, knowledge base articles (support information) and videos (mini videos to support learning). The E-learning modules are definitely a prerequisite for taking the exam and cover almost everything, the videos and the knowledge base articles are excellent for clarifying any questions we may not have understood. I would also recommend that you write notes while watching the videos to refer to them later.

In this structure of the exam, we should familiarize ourselves with each point of the topics to be covered and the weight of each one. The greater the weight, the more questions will usually be asked.

  • Email Marketing Best Practices: 15%
  • Email Message Design: 13%
  • Content Creation and Delivery: 18%
  • Marketing Automation: 19%
  • Subscriber and Data Management: 28%
  • Tracking and Reporting: 7%

SUBSCRIBER AND DATA MANAGEMENT – 28%

MARKETING AUTOMATION – 19%

CONTENT CREATION AND DELIVERY – 18%

EMAIL MARKETING BEST PRACTICES – 15%

EMAIL MESSAGE DESIGN – 13%

  • Given a customer scenario, recommend email design best practices to implement.
  • Given the desired output functionality, recommend methods for creating incoming emails.
  • Given the desired output requirements, recommend strategies for testing A/B email elements.

TRACKING AND REPORTING – 6%

  • Given a customer scenario, explain the different metrics available for email campaigns and what each one means.
  • Given an email campaign, describe the steps needed to analyze performance results.
  • Given the need to run reports, configure and run Cloud Marketing ad hoc and automated reports.

Tips

  • Cloud marketing is a complex platform, do not try to cover everything at once, focus on what the test asks for
  • When you take a test, first try to eliminate incorrect answers to make sure you are confident with each answer
  • Do all the Trailhead modules related to Cloud Marketing while taking notes to help you memorize and learn.
  • Read their posts on the Salesforce blog to stay up to date


Other credentials

I would also recommend that you consider getting certified on these credentials which I believe are important to get started and will add value to your resume:

Pardot Specialist

Salesforce Administrador

The 5 Essential Customer Journeys in Marketing Cloud (part 1 of 5)

the enssential
The Salesforce Marketing Cloud is one of the most comprehensive marketing platforms on the market. It has different modules that cover most of the needs of a modern marketing department, such as Social Studio for managing social networks, Advertising Studio for managing advertising campaigns, Mobile Studio for mobile communication or Email Studio for communication via email. If you still don’t know what Marketing Cloud is or you need more information about the platform, I invite you to read the following article that deals in depth with What is Marketing Cloud? Salesforce’s Digital Marketing Hub. The Contact Builder section is responsible for maintaining subscriber relationship data. If you want to see a more detailed explanation of Cloud Marketing, I recommend watching my video on youtube about the different parts that make up the platform.  

Journey Builder is the core of the platform and is where the Journeys we want to establish with subscribers/customers are configured.

What is Journey Builder?

Journey Builder is the part of the Marketing Cloud that serves to create paths of interaction with customers or Customer Journeys. The way to generate these journeys is through visual programming, for which we will use the Canvas of the application.

journey builder

The canvas is divided into a first vertical column on the left, which are the elements that you can drag and drop into your Journey (marked in the image with the number 1). You will see that there are 5 different categories of elements that you can include in a Journey: Entry Sources, Activities, Messages, Flow Control, Customer Updates and Sales & Service Cloud.

journey workflow

One of the most interesting elements that we can introduce in a Journey are the activities related to the Sales Cloud since we can Create/Update Contacts, Opportunities, Leads, Add members to a campaign or Create/Update any type of object in the Sales and Service Cloud.

The programming of each Journey is divided into 2 distinct parts: Entry Source are the elements that trigger the Journey (marked with A in the image) and cause us to introduce a user into the flow. On the other hand there are the elements of the Journey (marked as B) that program the interactions that we are going to do with the users.

journey builder workflow

In the Journeys that we will see next, you will see how you must establish a series of user input sources in a journey together with a more or less complex programming of the steps that we are going to establish with them.

The 5 Essential Journeys

There is multiple technical information in Salesforce itself that describes this part of the tool, but from a marketer’s point of view it is necessary to understand how to develop customized customer communication programs. One of the easiest ways to learn it is to know how other customers use it.

That is why we are going to review 5 cases in which I have worked in different companies within their Marketing Cloud implementation projects. It has been complicated to choose which Journeys would be chosen for this publication, given that dozens of different Journeys have been implemented over time.

Thinking about which would be the clearest and most didactic way, I present them to you starting with the simplest ones. They are ordered according to the different states of a supposed conversion funnel. Therefore, I present the 5 Journeys suitable for each stage, hoping that they can serve as inspiration for your project.

journey

1. Lead Management Journey (customer acquisition)

Establishing an orderly and precise customer acquisition process is a priority for every marketing team. The example we will see below is a simplification implemented for a technology company that offers complex IT/IT security products for its clients in Spain and Latin America.

Several types of lead capture campaigns land on the client’s website (Organic, Paid Media and Events especially) since part of the client’s products are based on an Open Source solution. There is a large niche community interested in security solutions.

The recruitment strategy is based on the early identification and qualification of companies interested in the client’s product. This is done through a product demo or a Free Trial. This modality of Journey can be extrapolated to different companies that commercialize products (like this case) or services.

lead management journey

The first point to comment is that the capture of leads is done through campaigns that direct customers to different forms on your website. Some of them allow the customer to sign up for the monthly newsletter, but the most important ones allow the customer to request a product demo (video conference) or a Free Trial.

The process coordinates the interactions between a sales team (called business development representatives or BDRs) and the Marketing Automation platform. Once the potential client requests a demo/trial or registration in a newsletter, he or she will enter a Journey where the sales team will perform a demo (and at the same time be able to qualify the sales opportunity) or obtain feedback on the trial that the client has performed and at the same time see how the product can fit into the organization.

The call to the client by the sales team after the trial period is a critical moment where the opportunity is qualified or disqualified with the client. A waiting time of 30 days is generated and the closing date of the opportunity is updated in case of not having a clear answer. Once this time has passed, the lead is transferred back to Marketing in case a sales agreement cannot be closed.

The leads enter into a Nurturing process extended by 6 months with a special follow-up, and in case this period of inactivity is exceeded it is transferred to the monthly newsletter list of the company. In case of inactivity for 365 days, the lead is discarded.

How this journey is implemented in Marketing Cloud

The first interesting point to highlight is how the leads generated in this Journey are introduced. In previous steps of the project, the client’s website and its integration with the Sales Cloud had been developed. So, using existing web to lead forms on the client’s website, new leads are generated and assigned to salesforce campaigns.

To reuse this functionality, the marketing cloud entry source is based on the entry of leads in the appropriate campaign.

salesforce campaign

define entry source

Therefore the leads enter the appropriate Journey in coordination with their entry into a specific salesforce campaign.

Let’s see below how follow-up calls can be implemented after a demo by the sales team (Nurturing Post-demo). Below is a simplified Journey in the Marketing Cloud about its implementation.

journey final

As always we are launching this Journey based on the contact’s entry into a campaign. These campaigns are coordinated with the team of sales representatives.

In point B we make a Split engagement (decision on whether the client opens the email or not) to update the client’s activity (if he opens it we increase his activity in point C or decrease it in point D).

Finally, in point E we generate a task for the assigned representative the day before the call attempt by the sales team. We finish by sending an SMS the morning of the call to confirm the appointment.

I hope this example has helped you to establish the best way to implement your Journey with clients in your projects. In the next articles we will review different techniques to implement them.

Knowing the best way to implement a marketing campaign on Marketing Cloud requires experience in multiple projects and technical support. The first steps in the platform always generate doubts. In ShowerThinking we are specialists in developing with your company programs to automate marketing campaigns. If you need help or training in Marketing Cloud we have the right team that can help you.

Reply Mail Management in Marketing Cloud: What it is and how to configure it

Reply Mail Management

Understanding what Reply Mail Management is when working in the Marketing Cloud is essential if you want to have a transversal communication between the company and the customer. If you need help in its configuration and in understanding all the functionalities that Marketing Cloud offers regarding Reply Mail Management, you are in the right article.

This post is focused on the specific use of Reply Mail Management in the Email Studio module within Marketing Cloud. If you are not yet familiar with this Marketing Cloud module, we invite you to read the following article, where it talks in depth about what Email Studio is: Email Studio in Marketing Cloud: what it is and what it offers. On the other hand, if you still do not know the Marketing Cloud platform or have not been clear about some concepts about it, you can visit the following article to familiarize yourself with it and know What is Marketing Cloud? The Salesforce Digital Marketing Hub.

Reply Mail Management: what is it?

When we talk about Reply Mail Management (or RMM) we mean the ways we handle responses to emails sent through the Marketing Cloud. These responses are produced automatically once Reply Mail Management is configured and include auto-responses and unsubscribe requests that we receive in response to emails already sent. In addition, Marketing Cloud allows us the ability to automatically forward emails when they need to be reviewed by a third party.

The first thing to do when configuring and using Reply Mail Management is to create a specific email address to be answered, called “reply-to address”. Once this address is created, when you receive an email, the RMM applies a set of matching rules to determine if the email is an out of office reply, an automatic reply or an unsubscribe request and acts on the message according to the previously configured characteristics.

The Reply Mail Management system also acts on these functions:

  • Forward an email to different users depending on the circumstances of the received email.
  • Make an auto-response and control the content of that auto-response message.

In the following image you can see an outline of how the RMM works in Marketing Cloud:

Reply Mail Management Process


Options to consider during the configuration process

  • Email Display Name. This is the name that appears when the subscriber responds to emails sent by the company. Ideally, a corporate name should be used in the case of a general email address, or there is also the possibility of using a name of a company employee.
  • Reply Subdomain. The subdomain is the part of the URL that points to the Marketing Cloud auto-response rules. If the company has an email address with the following structure nombre@ejemplo.com, a subdomain must be created that contains this structure, such as: email.example.com or reply.example.com.
  • Email Reply Address. Basically this option allows you to configure the email address that will appear to your subscriber in the communications they receive. It is important to establish a specific email address for this, such as: reply@ejemplo.com. Although this address is not a valid email address in most cases, it does not matter since the address manages the response through the RMM with the different sender profiles created.
  • DNS Record Redirect Complete. Before enabling this option and configuring the RMM you must complete the Domain Name System (DNS) record. This process requires technical assistance from the ISP and the Marketing Cloud representative.

Configuración del Reply Mail Management

The process of setting up the RMM is a simple process, but it needs to be done in a certain way. The process comprises three general parts:

  1. Specifying a reply subdomain (as we have seen before).
  2. Request the relevant DNS changes from the ISP and the Marketing Cloud representative.
  3. Configure the RMM settings within the Marketing Cloud

The most interesting part is the third one, and therefore we are going to observe how it looks in Marketing Cloud.

Reply Mail

As we can see, there are 4 sections in the RMM settings: Reply Address Definition, Reply Filters, Response and Routing.

The most important is the first one, which has been explained above. Then, in the filters, Marketing Cloud offers us an option to delete the auto-responses and out-of-office messages and another one to manually manage the unsubscriptions. We must pay close attention to the Response section as this is where we can manage the auto-response message we want to be shown to our subscribers, whether it is going to be specific, general or not. Finally, we are asked to fill in an email address where the remaining autoresponders will be forwarded.

Once the RMM configuration is established, we can improve this process by creating sender profiles and configuring Triggered Sends for auto-responders. This is common because in this way, the degree of automation when answering our subscribers is much higher and it allows us a wide flexibility being able to send auto-responses from different Sender Profiles. If you want to find out more about what a sender profile is and how to create one in the Marketing Cloud, click on the following link Sender profiles in Marketing Cloud.

Case Study: Importance of the MRI

The company Global Tech S.A. sent 20,000 emails on Friday. Without the RMM option, starting Monday morning, employees should manually manage all incoming responses such as out-of-office, auto-responses, unsubscriptions, as well as individual customer responses.

However, with the addition of the RMM option which manages a large percentage of responses automatically on the spot, customers are completely satisfied as they receive personalized attention the very moment they send their email response.

In short, the configuration and implementation of the Reply Mail Management option is a great success in companies that handle a large volume of weekly emails and want to save time and costs in managing the responses of their subscribers. In addition, the implementation of this option allows to put the subscriber in the foreground and offer him an automatic, personalized and instantaneous response, thus improving the perception of the company by the customer.

Do not hesitate to contact us if you have any questions related to the Marketing Cloud or if you are interested in being guided through its implementation.

What is a Sender Profile in the Marketing Cloud?

Sender profile

If you have reached this post, it is probably because you have difficulties in understanding what a Sender Profile is when you work with the Marketing Cloud. Read on to find out what a Sender Profile really is, the possibilities it offers to get the most out of it and everything it brings to you within the Marketing Cloud.

This post is focused on the knowledge about Sender Profiles in the Email Studio module within Marketing Cloud. If you still don’t know this module of Marketing Cloud, we invite you to read the following article, where we talk in depth about what Email Studio is: Email Studio in Marketing Cloud: what it is and what it offers. On the other hand, if you still do not know the Marketing Cloud platform or have not been clear about some concepts about it, you can visit the following article to familiarize yourself with it and know What is Marketing Cloud? The Salesforce Digital Marketing Hub.

What is a Sender Profile?

A Sender Profile in the Marketing Cloud, as its name suggests, is a profile that specifies shipping information and can be reused as many times as you want just by selecting the correct profile in the shipment.

The Sender Profile has its own name, which is very useful when identifying the different Sender Profiles (for example, if we handle Marketing Cloud for an international company, we can create different Sender Profiles for each country and differentiate them by name).

Within each Sender Profile there are two very important configuration sections:

  • Sender Information. Here you specify the name of the Sender itself in the e-mails and also the e-mail address through which you will be sending them (the “from name” and “from e-mail” fields respectively).
  • Custom Reply Mail Management Settings. Through this section, what allows you Marketing Cloud is to configure a “from name” and “from email” to perform forwarding, as well as configure auto-responses and forwarding through Triggered Send, which will be explained later.

Likewise, you can configure Sender Profiles based on the users we have in the Marketing Cloud. This is useful for companies that make personalized sendings through their employees.

What allows us to do a Sender Profile in the Marketing Cloud?

As mentioned above, the main functionalities of a Sender Profile are to differentiate the name of the sender and the e-mail address, as well as to manage forwarding and auto-responses based on Triggered Sends. All this by means of the possibility of creating as many Sender Profiles as we want and being able to use them only by changing the sending profile when doing so.

But you may ask yourself, isn’t it possible to personalize Sender Profiles based on the contact information of my company’s employees? The answer to this question is yes. Salesforce Marketing Cloud allows accounts that have the “Enhanced Sender Profile” feature to create a “Dynamic Sender Profile”.

Dynamic Sender Profiles

A Dynamic Sender Profile, is a dynamic Sender Profile that thanks to AMPscript technology changes its information “from name” and “from email” based on attributes previously loaded in the Salesforce CRM module for our customers.

The Dynamic Sender Profile will only work if the customers to be sent have two information fields previously loaded into the Data Extension and Sales Cloud with the attributes “from name” and “from email”. Once these attributes are loaded, using AMPscript technology and having created a Sender Profile that uses this technology to map the information loaded in the Marketing Cloud and Sales Cloud, the “from name” and “from email” will change based on the data loaded for each customer.

This is very useful when you have to send from different email addresses that correspond to employees of a company, and the content of the email is the same for all customers.

This particular Sender Profile, can have problems when there is a customer who does not have information loaded from these two attributes mentioned above, or the information loaded between Clouds is different. If this happens, Marketing Cloud will recognize the error and load the information “from name” and “from email” by default.

How to create a Sender Profile?

Creating a Sender Profile is a very simple process that will only take a minute. To do this, go to Email Studio and within the Admin tab in the Send Management section choose the option Sender Profiles.

Once you are in the Sender Profiles menu, just click on the Create button and once you are in the menu, all you have to do is fill in the requested fields with the data you want to put in your Sender Profile.

In the following image, you can see the steps to follow to reach the Sender Profile menu and create one:

create sender profile

What is a Triggered Send and how to assign it to a Sender Profile?

Triggered Sends are commonly used to send relevant, personalized and timely messages to users. These types of messages are usually welcome emails, automatic no-response emails or thank you emails when making a transaction, among others.

This type of sending allows you to associate it to a Sender Profile to show the sending information and associate it to a specific email previously created so that this type of email is always shown. In addition, they allow you to manage whether you want this Triggered Send to be excluded from any list or data extension, as well as to add users from this Triggered Send to different lists or data extensions.

To associate a Triggered Send to a Sender Profile, the only thing you need to do is enter the Sender Profile configuration (as shown above) and in the Custom Reply Mail Management Settings choose the options to use an auto-response or forward through a triggered send, that simple.

image triggered

Advantages of creating Sender Profiles

As mentioned above, the main advantage of creating a Sender Profile is that we don’t have to fill in “from name” and “from email” information every time we send an email in the Marketing Cloud.

This advantage is reinforced with the possibility of creating Dynamic Sender Profiles, since once a Dynamic Sender Profile is created we can use that same profile to send an entire department, as long as the content of the emails is the same among all the Senders.

Finally, I would like to emphasize the main advantage that Marketing Cloud allows us to configure Triggered Emails to set up the auto-responses and forwarding of a Sender Profile.

In any project where you want to get the most out of Email Marketing strategies, the possibility of creating Sender Profiles with Marketing Cloud, allows a detailed customization, a considerable time saving and better results. Don’t hesitate to contact us if you have any doubts related to Marketing Cloud or if you would like us to guide you through its implementation.